Hello Everybody!
How have you been?
Thank you for your sweet comments!
They are greatly appreciated.
I have been trying to stay busy to keep
my grief at bay. Am not sure that it
works, but I try.
Granny's shower is very simple to make. I am
not sure if you have guessed what it is
or not.
When I made this shower, I was not sure
that it would look good.
But it does work and I am very pleased
with the outcome.
Do you remember what
Granny's shower looks like! Here are
4 pics to recap.
The curtain was made by taking a
piece of fabric that was about
2 inches wide by the length that
I wanted. The shower curtain is
glued at the top under the valance.
It is shaped into place.
The valance was cut the desired
length and width that I wanted.
And then I lightly gathered the top
of the valance and glued it into
place. I did not hem the shower
curtain or the valance.
The pink tile is just paper that I printed
off of the internet. The same tile paper
covers the floor and the walls.
I did not do a good job matching the
tile together at the top. But it is okay.
I bought the shower nozzle and
the shampoo bottle. The hot and
cold knobs are just beads.
The little shelf was already attached
to the phone booth, but it was easy
to remove, so I tiled it to match
the shower tile.
This pic is a close up.
I wallpapered the only side of the phone
booth that had a back with no plastic.
This is the bottom of the shower. Look at the price
of this when it was new! Too pricey for me. In fact,
I never bought this item, it was given to me by a lady
that was getting rid of some of her stuff. I had no use
for it, but I do not turn down anything that anyone
gives me.
I have had this for many years and on Granny's
apartment finally figured out what to do with it.
Have you guessed now what this is?
I did not take any pics of my progress, but I will
tell you what I did.
Here is what the phone booth looked like when
I received it. It was in bad shape.
See how dirty the plastic is. I
was not sure if it would come clean
or not. The doors were easy to take
off of the pins. I left the pins there
just in case I want to put them back
on. I hid the pins with the shower
curtain.
A side view of the phone booth.
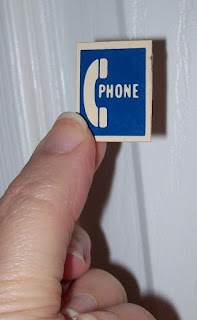
The phone sticker was so old that it peeled
right off of the plastic with no problem.
I kept it just in case I need it for
something.
This is the back of the phone sticker. It was not
even glued. No wonder - who would have guessed!
The bi-fold doors are so cute. I contemplated using
them, but decided I liked the idea of a shower
curtain better. I will use these doors as a
folding screen in another apartment.
Okay, for the first thing I did
was to remove the phone and the
little attached table. On the last
pic you can see the damage it
left on the inside wall.
Next, you will need to clean it
up, take some window cleaner and clean
the plastic till it sparkles!
Then paint all of the wood pieces
inside and outside
white or any color that you
desire. Afterwards, save some
tile pictures from the net or
use what you have and tile
anyway that you like. Add your
shower curtain, a valance and
you are done! So simple.
Just a little time consuming
because of the paint. It took about
4 coats of paint on my shower to
get it to look like that. You might
want a few more coats if you are
going for a pristine look. If you
want shabby chic then stop painting
after a couple of coats.
Damage on the inside wall before it
was tiled with paper.
If you have a phone booth, I hope you get
some use out of it, if not a phone booth,
perhaps a shower!!
I hope you enjoy this tute!
Thank you for visiting me!
Hopblogger


