I love anything that looks nice and
is easy and fast to make.
Are you like that also?
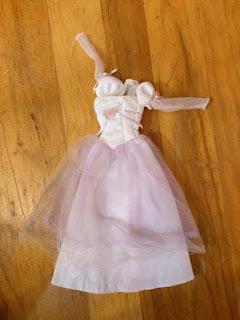
I was at the thrift store one day,
and saw some (Barbie/fashion doll) long gowns.
Some of them were in very bad shape.
But those are the ones that I buy!!
My intentions are simple - CUT THEM UP!!!
The gown is still nice, but
see the tulle - it rides up and does not
lie flat.
Really it is best to
remake remix reuse the parts!
At least while some parts are still useable.
Directions are really fast and simple!
Read on.
1st - I cut away the top half of the bodice.
Leave some as I have here to turn under.
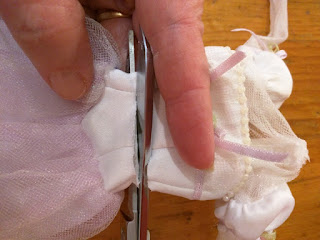
2nd - I cut away the fabrics on each side of
the seam.
3rd - This is what it looks like
laid open and flat on the table.
4th - If you like this look, then leave
the white skirt on, that is under the tulle.
Do not make a front seam.
Turn down the white (at the top where my fingers are),
to the inside and stitch down
lightly gathering.
Butt the 2 raw edges together
and tack together only on the white.
5th - Double thread a needle at least
6 inches long with candle-wicking thread,
knot on one end.
The tulle is open in the front.
On the inside of the tacked edge, with your needle
and knotted thread make a tiny stitch
and then leave a 6 inch tail like you see
in the photo.
Thread needle again and stitch in the
back and leave a 6 inch tail again.
Repeat for the sides.
When you finish it should look like the
picture.
Tie a knot as the picture shows to keep
all of the threads together. Make
sure that there is no slack and all threads
are even.
6th - Decide where you want to hang the
canopy and screw an 'screw eye' in the ceiling.
Decide how low or how high you want
the canopy to hang from the floor.
Adjust the knot lower down or higher up
and cut off excess threads.
Hang canopy on the 'screw eye' near the knot.
I like only the tulle, so I am preparing to
cut off the skirt. Separate the tulle from the skirt.
Finger press both items down.
With scissors cut the tulle away from the skirt.
Try to cut evenly and straight.
Follow steps 4th, 5th and 6th.
Here is a canopy made, already hanging.
Side view.
Here is the same canopy hanging. Looks cute!
Front view.
I wanted to show you the canopy already made
that is pictured above.
It was made the same way.
I washed both of them, as they were really dirty.
The canopy on the left is more dirty than the other.
This one was so dirty that I washed it at least 6 times.
And then I stopped - thinking that it would not become
white.
But that is okay because it will look old,
well-used and will drape nicely.
This is the one that you see hanging with the
purple in the front (2 pictures up).
This one could even become a wedding veil!!
This one became whiter almost immediately.
Apparently it is not as old as the other one.
It is a bright white!
As of yet I have not placed this anywhere.
As of yet I have not placed this anywhere.
Several times both canopy's was draped
on my faucet.
Even on the faucet see how well they drape.
Even on the faucet see how well they drape.
Candle-wicking thread is used
for the long strings. Of course
the needle was double threaded.
There is a bulky seam that I didn't think would be
a problem. But I think that it looks so bad so I shall
remove it later.
The canopy is still cute!
Thanks for stopping by!
Hopblogger


