
This cream dress was made about 13 years ago
and it hangs in my dolls
shabby chic apartment.
It was hand stitched.
You could machine stitch it.
The only glue on it is where the
little roses are glued.
The little dress should have had a lining.
I was so happy with the
little dress that I forgot to do that.
Line it or not - your choice!
If you choose to line this skirt
all you do is make another little
slip and place it under the slip
and slip stitch the 2 together.
Other styles can be made using this concept.
Don't be afraid to make
This lovely dress is made for
display - but perhaps could be worn!
Reason is because you can adjust
the bottom half and the top half
once you put them together.
These 2 dresses are different
because of the type of lace they
are.
But they are made the same way!!
The difference between this dress
and the dress in the next photo
that I am making - is that
I am lining the other!

This tutorial is long, but easy.
I am just making sure that you can
understand me.
It is not easy writing a tutorial!
I am just making sure that you can
understand me.
It is not easy writing a tutorial!

Materials needed:
- 2 pieces of 3.5 inches wide white lace
- tiny narrow ribbon
- OPTIONAL: a small amount of cheesecloth or
fabric (for lining)
fabric (for lining)
- small roses or other items to decorate
- needle and thread
- glue
Directions: This photo shows about the width of the white
lace that I have used.
You can buy this lace at your fabric
You can buy this lace at your fabric
store - but I have always used baby clothes when making my
miniature doll clothes.
That's where this lace comes from.
And this is a lot of lace for $2.00 as well
as the lovely white cotton!!!
That's where this lace comes from.
And this is a lot of lace for $2.00 as well
as the lovely white cotton!!!

This is the cheesecloth that I am lining the
bottom half of my skirt with.
Notice that by my thumb the cheesecloth is doubled.
bottom half of my skirt with.
Notice that by my thumb the cheesecloth is doubled.
It is thin so you will need to
cut 2 pieces of this.
Or use a piece of fabric for lining.
Or use a piece of fabric for lining.

Cut 2 pieces of the lace - about 5 inches long.
One piece is used for the skirt -
One piece is used for the skirt -
the other piece for the top.
Put one piece aside for now.
(now is the time that
(now is the time that
if you want the doll to wear the skirt - then you will
have to adjust by adding more lace
width if the doll is fat).
width if the doll is fat).
If the doll is skinny then the measurements that
I gave above should suffice.

Lay one piece of lace on your table, make sure it
is the backside and is straight.
Lay your cheesecloth or fabric
on top of this lace.

Make sure everything is straight and that
the cheesecloth or lining does not hang
past the lace.
the cheesecloth or lining does not hang
past the lace.

If everything is to your liking, then pick it up
gently and stitch through all the layers
by hand or machine.
gently and stitch through all the layers
by hand or machine.

Cut off any excess seams.

Turn the lace skirt right side out.

If you use cheesecloth or fabric, be sure to pull
the lining up, because the top is not
sewn together.
For display - stitch thru all 4 layers at the top
to close.
sewn together.
For display - stitch thru all 4 layers at the top
to close.
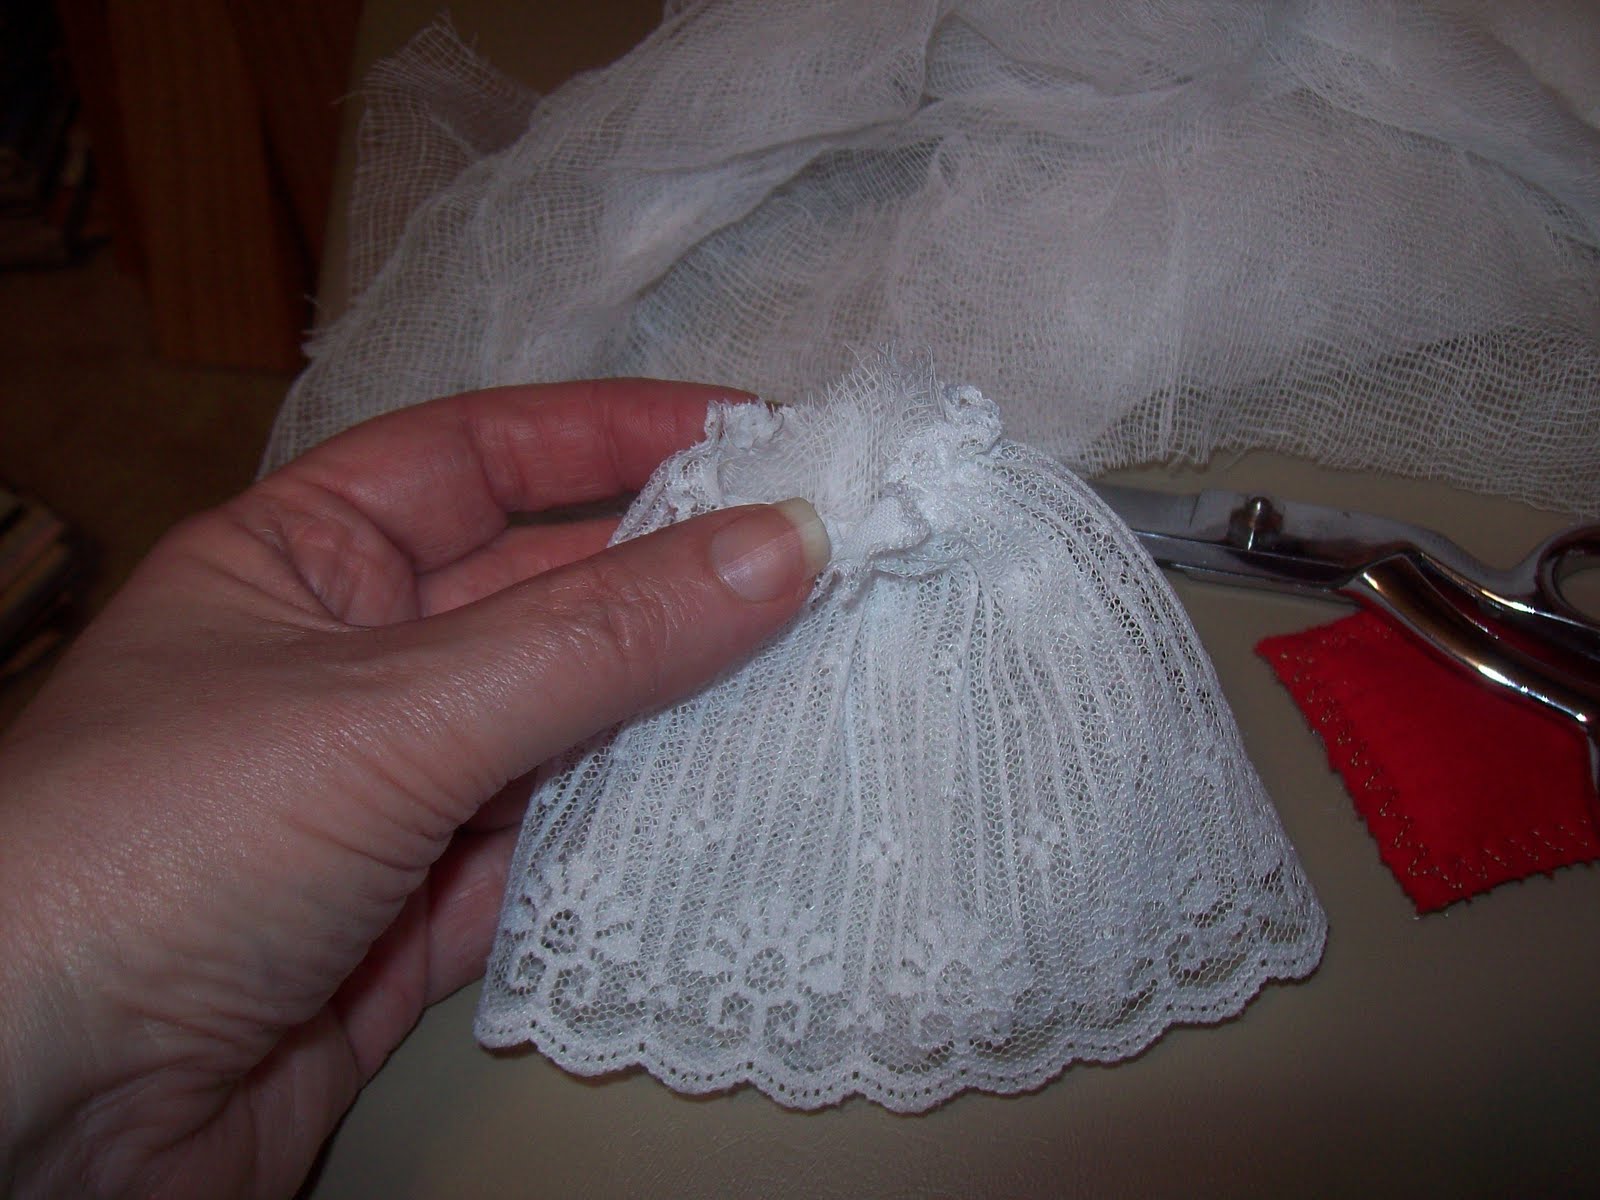
This is what the top should look like,
if this is for display.
The skirt is finished so set it aside.

For the doll to wear -
Start at the top back seam and with a needle and thread,
stitch through the lace and the lining.
See here I am - stitching around the skirt.
Make sure
Make sure
that when you stitch that you stitch thru the cheesecloth
or the fabric lining.
or the fabric lining.
When finished - place it on your doll, gather
tightly, knot it and cut off the thread.
It doesn't
tightly, knot it and cut off the thread.
It doesn't
matter if the knot shows because it
will be hidden by the ribbon.
will be hidden by the ribbon.

If you see any cheesecloth lining
peeking out below the skirt then
cut it off. Cheesecloth stretches.
If you have fabric, then lightly put on some
'Fray Check' or narrowly hem it.
cut it off. Cheesecloth stretches.
If you have fabric, then lightly put on some
'Fray Check' or narrowly hem it.

To Make The Top -
Take the second piece of lace that you cut earlier.

Place wrong sides together.
Make sure the bottom edge is even.
Make sure the bottom edge is even.
Starting at the top of the lace , make a knot
and sew down to the bottom edge, knot off
and cut off the thread.
and cut off the thread.

I like to stitch down to the edge and then back up.
Stitching this way gives it strength.
Stitching this way gives it strength.
You are unable to see any of the stitching.

Cut off excess from the seam.

Now turn the lace piece right side out.

Finish making for display -
Now take the skirt that you finished earlier
and put it under the top as I show here.
and put it under the top as I show here.
Take it to your miniature doll
and adjust the top up or down so that the top
of the lace ruffle hits
of the lace ruffle hits
where her breast should be.

Keep adjusting it until you get it like you want it.

Once adjusted to your liking, put the
2 pieces together.
Make sure that all the seams line up.
Then hand-sew thru all the layers
of the top and the skirt from the front to
the back - as shown in the picture.
of the top and the skirt from the front to
the back - as shown in the picture.

Gather with your fingers to make it all fit together.
When finished sewing - knot it.

See my knot.
I am not worried about it because it
I am not worried about it because it
will be hidden by the ribbon.

Ribbon at the waist -
Cut a 9 inch piece of ribbon.
Wrap it around
Wrap it around
the dress hiding all the stitches.
Make sure you hide the knot.
Tie the ribbon in a knot or a bow.
Cut off excess ribbon.
Make sure you hide the knot.
Tie the ribbon in a knot or a bow.
Cut off excess ribbon.
Sorry no photo for the ribbon - refer to the
first photo.
first photo.

For Straps -
Cut 2 pieces of matching skinny ribbon
each of them about 2 inches long.
each of them about 2 inches long.

On the front side, glue or hand-stitch
both straps to the inside top.
Glue or hand-stitch to the back one strap
at a time.
Glue or hand-stitch to the back one strap
at a time.

Play with the skirt until it looks
the way you want it to.
Adjust gathers if needed.
the way you want it to.
Adjust gathers if needed.
I took a small piece of cheesecloth and
stuffed it inside the top to
give the illusion of it being lined.
Display dress is finished - Hang on a hanger!
stuffed it inside the top to
give the illusion of it being lined.
Display dress is finished - Hang on a hanger!

For doll to wear -
Use the directions for making the top.
Make a knot in thread. On the inside of top,
run a gathering stitch around the top.
Place on doll where you want.
Pull tight but do not break the thread.
Knot and run the needle to the inside of the top,
Pull the knot to the inside and cut off
excess thread.
On outside adjust gathers so they are even.
Follow directions for the 'ribbon at the waist'.
Make sure
the ribbon hides the skirt underneath.
Follow directions for the straps.
If need be, you can stuff the inside top
with pieces of cheesecloth.
Thanks for stopping by!
Hopblogger
Hopblogger


