Wednesday, July 21, 2010

Apartment Elizabeth - Elizabeth has moved into her NEW APARTMENT!!

Elizabeth and moved in with the
help of her sisters Melinda and Belinda.
I am sure that furniture will get moved around
again, as I have a lot to fit in here.

Maybe some stuff stays maybe it doesn't.

So far the apartment is airy and spacious.
As you see, Elizabeth stays in the bed.
She is not an invalid - please get up Elizabeth!


Come on in, Come on in!
You do not even have to knock, the front
door is open.

I did change the kitchen from white appliances
to the oak set.
The room needed grounding from all of that
white.

I placed the stove in the middle of the area.
I really like this here, kind of reminds me 
of a little island in a kitchen.
There are 2 ways to walk around it to get
inside the apartment.
But, is this safe with kids??
Probably not.

There is a corner china cabinet that holds a
few dishes now.
If it stays, I hope to fill it.
I wish that I could get a pic of the view from
the stove looking out thru the windows.
I absolutely love windows!!

I made the little white cabinet that sits on top
of the oak corner cabinet.
It is a box that I painted white and edged in
red, then hand painted the
words 'Bread'.
I made this back in 1994 from a pattern in a
library book.
Do not remember the books name.


The white that you see towards the left,
is not glare - I am actually taking this pic thru
the window behind the stove.
Things are being moved in.
I do like the idea of the sink and the refrigerator
being there, but dislike being able
to see the bedroom side.


Hey, do you think that Elizabeth is pregnant?
Perhaps that is why she is in the bed all the time.
Maybe the doctor said that she needs 
complete bedrest.
This could explain some things.

A white high chair sits near the table - who
may it be for?
May is 2 years old and sits here to eat!

Yum, yum - Chocolate Cake!


From this angle you can see how spacious 
the kitchen area looks.
Could be easy to keep clean.


The rocker is very much needed, cause
Hank gets fussy every now and then.

Hank needs a proper bassinet, but am 
afraid that there is not enough room
for one.
Not sure that I like Elizabeth's pillow
propped up against the back of the kitchen sink.


I made all of the bedding.
My favorite color is chocolate and then
pink.
Even though the matching color to the brown
would be a salmon or a rose,
I felt that the pink would help liven it up.
I had enough of these fabrics to do 
some small window treatments.

The dresser at the foot of the bed as of
yet, has no clothes in it.
I have started putting things inside 
of the armoire.

Elizabeth's slippers are beside the bed.
I keep putting the little pink rug in and out
and also keep moving the rocking chair.


Sometimes Elizabeth rolls over and stares out of
the window when Hank is sleeping.


On top of the armoire is just a plastic little
box that I covered. 
Inside is just some pieces of fabric
to represent baby clothing.

A jewelry box that I made back in 1994 sits on
the top shelf.
I strung a few beads together to 
represent a necklace and put some ribbon
in the box.

The second shelf is a little blue quilt that
I made - for Hank.
And of course there is some little girl
pampers - for May
May's little dress and robe hang on
the armoire.
Yes, Elizabeth has 4 children!
May is 2 years old and sleep with Elizabeth.


There are the bunk beds for the twin girls
Allie and Allison.
New bedding is needed for them.
I had room for a toy/blanket chest under
the windows.


Still room for some more things.


I do love all this room.
Makes me wonder whether or not
if I should put a lot of stuff in this
apartment.


Another pic that shows the kitchen area
and the twin girls bunk beds.


Thanks for stopping by!
Conny

Monday, July 5, 2010

Apartment Elizabeth - ELIZABETH IS MOVING INTO A NEW APARTMENT - Wallpapered and Floored

Located on the 4th floor just under the
Penthouse - this is the 
last apartment to be wallpapered
and floored. 

Each of these apartments are of my own design.
It surely isn't easy trying to make each
apartment different and to make
everything fit in them.
 
Measurements for each apartment.
The width of each apartment is 16 inches deep.
That is going from the very back wall
to the front.
The length is 23.5 inches.
As you see in the
apartment that figure is going from the
left side window to the right side of the
windows.

This scrapbook paper gives an oldappearance to a somewhat dated
apartment.
I used a total of 5 sheets to wallpaper it.
Also the paper is a little thicker.
It still
adhered to the walls with ease.
The bubbles smoothed out
almost instantaneously!
I am going to use scrapbook paper
to wallpaper all of the apartments.
Take a look - it is pretty paper!


The scrapbook paper gives a good feeling
to this apartment.


Cloth floors look wooden and
are very convincing in looking 
like the real thing.
 This fabric was bought back in the 90s.
Easy to measure, cut and glue down.
 

I was looking for a different kind
of arrangement to this apartment.
Am experimenting with where
to place a kitchen.
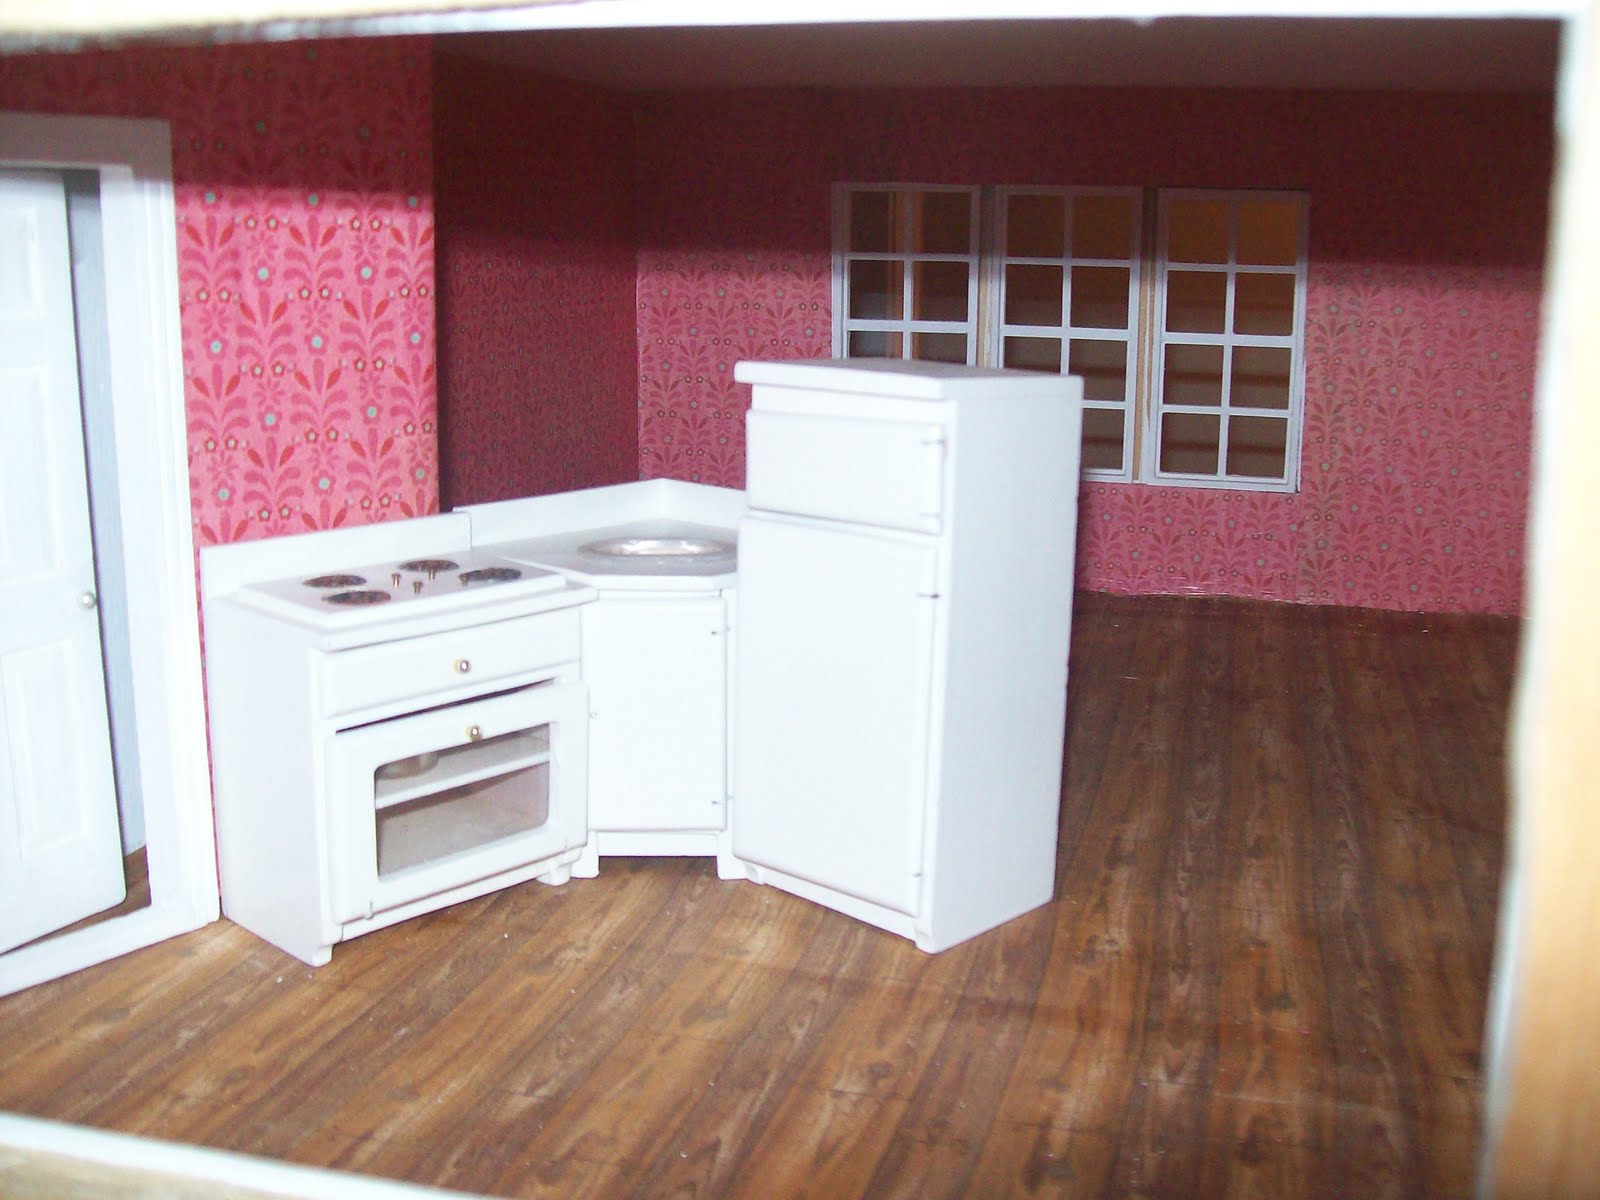
I turned the kitchen at an angle.

The Refrigerator, stove and sink
were from a part of a larger set.
I turned the corner piece into a
sink area by cutting a big enough hole
in to insert a little plastic butter tub.
This little plastic butter tub,
amazingly I have held onto it
since the 1990s.
I do not think that you can even find
these anymore.
 
I like this arrangement.
But now sure if this kitchen set
will stay in this apartment. 


The lace curtains are from an old
elongated oval doily that had holes.
I hated cutting it up, but really
when they are beat up this
bad, no use to keeping it
around.
Better to do something with the lace
than to throw it out.

The lace was still pretty and a had
a wonderful feel to it.
It has little roses with
a lightly gathered rounded edge.

Yes, clearly the lace curtains
have seen their better days.
But I was able to get a lot of
curtains out of it.
The landlady hang up these curtains
cause she no longer wanted or
needed them in her house.
 Oops I need baseboards,
ceiling and window moldings!


Workmen have been going in
and out for days.
Sometimes they leave the
door open.


Most of my apartments do not
have any corners that can be
used.
This is the first!
 

Yea - you can see my
boo-boo's in the corner.
Moldings will cover them up.
It's okay, because
this apartment building has
been around since the 1700s
Nothings straight or plum.
In fact, the entire building has cracked.
 
It's had many owners and they keep
updating and renovating it.
Frankly the landlady is tired
of it all.
Landlady needs to make some
money from these apartments.

Good thing that the
pipes were enclosed years ago 
before she bought the place.

This is the back side of the apartment.
The lonely window that you see really
faces the front of my dollhouse.
Right now the front of my dollhouse
faces my bedroom wall.


Thank you for visiting me!
Hopblogger

Saturday, July 3, 2010

TUTORIAL - TURN FRENCH DOORS INTO A DIVIDER SCREEN

It is easy to turn simple French doors
into a usable and functional
divider screen to use in your
Miniature Dollhouse rooms.
 
I had a set of French doors that the
molding had broken and I did not
want to replace moldings.
So, I decided that I
needed a divider screen
more-so.
 
In one of my Miniature Dollhouse
Books (cannot remember which one),
said to use ribbons.
So I decided to do just that!
 
My pics are a little out of order,
because I made the divider screen to use
in Samantha's Apartment.
And after I made them - I painted them white.
Then I decided that I would paint
them chocolate brown.
Then I decided that Samantha did
not need a divider screen.
 
This is the French doors in their
raw state.
Like I said, my molding got broke
really bad in a number of spots.
I decided not to replace the
molding.
 
You can see here the divider screen
made from the French doors.
There are only one coat of white
paint on the divider screen.
Here they are already painted
white, but I started painting
them a  chocolate brown
as you can see by the window glass.
 
I cut  tiny 1/4th inch
wide white ribbons and glued them
to one side.
I glued 6 ribbons for added stability.
These ribbons were painted over
when I painted the divider
screen white.
I have painted over them with chocolate brown
to match the divider screen.
 
 
I also cut 2 pieces of balsa wood
for shelves and added some
knobs below to hang hangers.
 
This is a close up of the shelves and knobs.
 
 
UPDATE - I re-painted this one
side white again. I wanted it to
be messy (trying to achieve a shabby
chic look).
I know you cannot see it, but there
are bits of brown on this side.
After painting it back white, I
took a toothpick with some brown
paint on it and randomly gave it some
marks. You can see a couple at
the bottom right side of screen.
 
I took some cotton lace and gathered
it at the top and bottom and
then used tacky wax to adhere it
to the screen.
Cotton lace stretches!
 
I placed clothes upon it to use
in Diana's apartment.
Thanks for stopping by!
Conny

Wednesday, June 30, 2010

BEDS - A Daybed that I made!

I thought that I needed a daybed,
turns out that I did not need one at all.
 
Perhaps I will use it one day in a
room setting or a dollhouse.
 
I do not have any directions on
how to make it.
 
I made it out of foam core board.
Then printed some pics off of
the net that looked like white boards
and glued the paper on.
 
I think that you get the gist of it.
 
I used a nubby puffed blouse for the pillows
and the cover.
 
This is the back that will be against
the wall.
Doesn't look too bad.
 
 
Underneath the bedding is paper over the
foam core board.
 
 
This is the width of the bed skirt I used.
It was made from piece of a cotton that had
a ruffle on the edge.
 
 
Here is the length.
I did not hem any of it.
All I did was just turn under any raw
edge so you could not see it.
Then placed it on the bed.
The mattress will cover it
anyway.
 

 For the mattress, I took another piece
of foam core board and cut it to
fit the bed.
I cut 2 pieces of cream/white felt and
wrapped it around the foam core board.
Glued it on.
 
 
Thank you for stopping by!
Conny


Thursday, June 17, 2010

Apartment Elizabeth - Changed Her Furniture Around Again!

Yep, I went and did it.
I did it again!
Moved Elizabeth's furniture
around till I came up with this!
 
Hope it looks better.
I do not know if this will work or not.
We'll see!
 
I like the kitchen, just dislike how you cannot see
it.
 
 
Thanks for stopping by!
Conny