Thursday, June 1, 2017

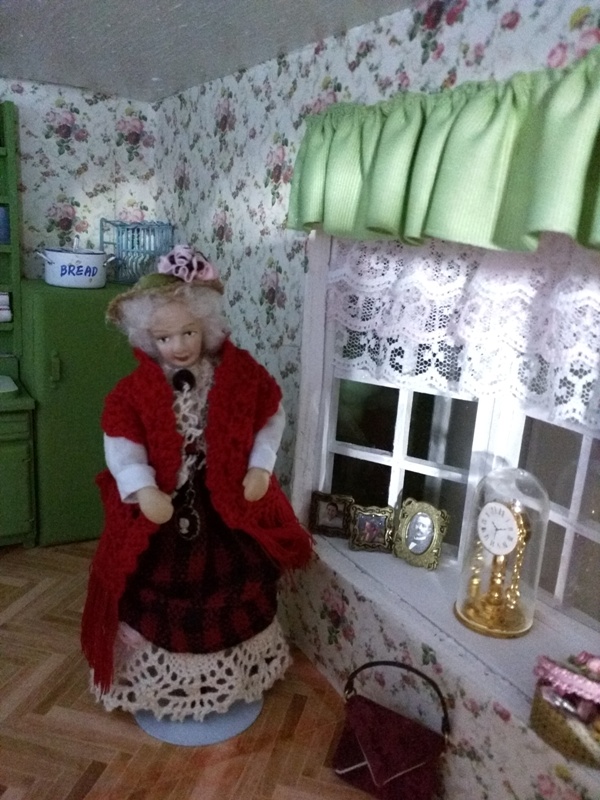
Apartment #6 - Granny's Sewing Aptmt - The sewing area


Hello my fellow bloggers!
How have you been?
 
I still hurt
very badly from the passing of my
daughter Pepper. I cry a lot and I
guess it will take me a while to get
over the crying spells. Anyone that
has lost a daughter knows how bad
this feels. 
I cry as I write this posting, but I
feel that I need to keep busy. So I
do so with a heavy heart. 

 
This is also another piece of the middle
of the apartment. This little miniature chair
is a peach color. Granny's generally do
not have anything that match, so I thought
it was fitting to put this chair in here.
It is made of resin, I think? Anyway it fits
perfectly in this space.

Raine and Willits Designs made lots of 
different kinds of these chairs. So many
of them are just beautiful! If you see them,
buy them and use them! They fit in well
with dollhouse miniatures.

Ooo, I finally got a very nice picture!
This is a corner chair. However it only
seats one doll.

This round table will set in front of the
corner chair. The skirts are in pinks.

The top of the table holds granny's post cards
and letters that were sent to her by her husband
whenever he went out of town. Now, she keeps
them on this table forever because she misses
him so much!!
She often reads them and cries when she is
alone.

This is where the corner chair and the table
will be placed at. 

A peek thru the window at the table!

A peek thru the window at the
chair!

This pink chair belonged to a sofa and another
chair. This was the only pic that I could find
of this chair, so here it is.

This is a little mini quilt that I started stitching
quite a while ago. Not knowing where I would
put it. Am so glad that it has found a home now.
Another quilt the same as this was hand stitched
by my granddaughter Elise. It is special to
me. But sometimes I have to make 2 of the same
thing!
I also hand stitched half of this quilt so I could
put it in a frame. 
For the quilting hoop, I used one of those
cross stitch KITS with the little hoop. They
come in colors of white and red. Perhaps you
have seen them, if not let me know and I
will post a pic of the little kits. 
The little white hoop is about 2 inches
around in diameter. Just the perfect size
to place on the quilt.
The hoop IS NOT GLUED to the quilt.

This is the cardboard that is included
with the hoop in the cross stitch kit. I
sewed it thru the backing of the fabric 
to the top of the quilt. Those stitches in
the front of the quilt are hid by the 
hoop.

I was hoping that this would stay,
but it would not. In order to keep the
hoop on I had to stitch the hoop to the
quilt going from the front to the back
of the quilt and back again to the front.
Then pull each large stitch tight and
knot on the backside.

After I stitched the hoop on, I positioned
the quilt like I wanted in the chair.
I pinned the quilt to the chair in many
areas from underneath the quilt.
The sewing basket IS NOT GLUED
to the quilt.

I was hoping that you could see some of
the stitches on the quilt.

A little view from the side.


The quilt is pinned to the back of the chair.

Am glad that you cannot see any pins.

Everyone has seen one of these. Well, this one
is a little broke at the top. Blame it on the MOVERS!

I like the door that opens. Do
not like the pendulums though.

This is where the grandfathers clock
will call home.

A better view of the sewing basket.
I love sewing baskets! I bought this
basket a few years ago. I cannot remember
who I bought it from.

A look at what this section looks like.

This is so cute!
I love sewing baskets!

A side view.

Oh my, is it getting late?

Here is the sewing table.

Each shelf holds a package of real batting.
Each size batting is about an 8x8 inches. So
if I wanted to use it, I could. For the label,
I saved a picture and then printed it out.
All I did was wrap it around the batting. It
stays pretty good without glue. A little
yellow and black measuring tape is curled
up and sets on the top shelf beside batting.

The second shelf holds a little pincushion doll. I 
had completely forgot about her because I have had
her for a long time. She doesn't even have any pins
in her.

Below the sewing machine are 2 shelves. The bottom
shelf holds miniature quilt fabrics. They are not
glued in, they are simply folded and placed there
side by side. Each miniature quilt is about 7x7 inches.
On the top shelf there are some fabrics and a green
cutting mat.

I cut the little blocks from miniature fabric. They
are little log cabin blocks.

The sewing machine sets on top with thread on it.
The quilt is faux and is the perfect size!

Threads set behind the sewing machine.

I think this sewing basket is made of cream cross stitch
fabric. I have had this one also for many years.

Just a side view of the basket.

Backside.

Looking in one of the sewing baskets.

This is the home of the sewing area. The sewing
basket sets on a green chair that used to be
white.
I hope you enjoyed looking at this segment of
the apartment.
The last and final segment of Granny's apartment
will be posted in about 2 weeks. 
I hope you enjoyed viewing this segment.
Please be safe.
Hopblogger
 

Monday, May 22, 2017

My Daughter - Pep

Hello everyone.

Granny's apartment is finished and looks lovely.
Please bear with me as I tell you the bad
ache that I have in my heart.

I was going to post last Wednesday, but could not.
My words will be few in this posting.

My daughter was pronounced dead late Thursday
evening. 
As her Mother, I am totally messed up right now.
She was one of the most 'Unselfish' people that I know!!
She was always caring for you, trying to help you in
anyway that she could. Pep was loving and sweet.
Funeral services are arranged but it will be around the
1st June before I post another segment of Granny's apartmt.


MY LOVE, HEART and SOUL GOES WITH HER!
RIP my sweet daughter,
Hopblogger


Tuesday, May 9, 2017

Apartment #6 - Granny's Sewing Aptmt - Table and Bed and Bay Window

Hello Everybody!
Thank you for your sweet comments!!
They are greatly appreciated.
Am sorry about taking so long, but it
takes me a while to get things like
I want them.
 
Like all of my apartments, the rooms
are in sections. When I have to take
things out of the other apartments
to get to something - well, those
apartments are far easier than this
one. Granny basically sleeps in the
middle section. Also she does her
crafts in this section.
So to fix anything or to add in anything
in this section then I must take out the
bathroom and closet area.
So this is the reason for starting
at her front door.

Granny has been talking to the
movers. They unpacked a couple of
her boxes and placed her photo's on
her bay window just as she asked them
to. They do as Granny asks. The clock
in the window was so loved by her
hubby that she had to bring a piece of
him with her to her new apartment.
I will show you the other pics soon.

This is an old rug that Granny has owned
for ages. Actually I stole this from
another apartment cause it looks better
here. I made this rug back in the 1990s.
I do not remember the book but I wished
I had it as there were some really good
tutorials in it. It was a library book.
I would like to make a better one.

Here is the back. The glue has held up very well
considering its age. It has hardly yellowed. The
backing is cloth.

The movers placed the rug down exactly how
Granny wanted it. She likes her old rug. She
always says that you must blend the new in
with the old. Gives rooms personality.

Here is the window where the well-loved clock
will forever sit, that is as long as she lives here.
Her beloveds photo is the first man beside the
clock. She kissed his photo before she placed him
down beside the other people in her life. See, Granny
never had any children. The photo's are of nieces
and an ancestor.
I printed out a cigar box in memory of her
deceased hubby. And I cut numerous toothpicks
to fit inside. It is full with cigars! So much so, that
I had to put a little ribbon around the box to keep it
closed so I would not loose them! The ribbon can
come off easily as it is not glued to the box. I plan
on making a couple more and put them here
as they were fun to make. Every once in a while,
Granny opens the box up and smells the cigars.
Gee, they smell good!!

The old timey phone is also a piece belonging to
her hubby. It is no longer serviceable, but looks
good in the tiny space.
Beside it, is one of her sewing baskets. I do not
remember who I bought it from but I have had it
for years. And I am sure that it did not cost that
much back then.

Here is a better picture of the sewing box. The lid is
permanently glued to the box as it shows. So
cute!

A little better peek at the roses!

I intended to show the tiny roses better with
this picture. This was as clear as I could get it
for a top view.
This is an adorable sewing basket.

A closer look at the cigar box and pics. Although
light did not do well on the photo's.

Granny instructed the movers to place her
table and chairs right here. She has been placing
lunch up there because her friend the Widow
Sarah is coming by so they can do some sewing!
I have had this set for a very long time. I do
not know who sold it to me, but it has taken me
at least 3 years to place it somewhere. I am
glad that it finally found a home here.

Look at how dainty it all looks!! Of course it
is all glued down.

Here is the top! They are eating sandwiches with
a green olive on top. a slice of tomato and some
potato chips. Ooo and a cup of coffee!
Yummy!!

This is the best photograph for seeing the centerpiece!
It is a teacup! This is so lovely!! And so tiny!!!
It is so hard to believe that a tiny scene was placed
here. The little stones appear to be made of clay.
Wish I could remember who sold me this!

See the back of the cup!

And the top!! Look at all of those flowers and
foliage. Amazing!

This lady had talent!!

And of course the last side of the teacup that is
sitting on its little matching saucer.

This is Granny's bedcover! Made by just_jas on
ebay. Her blankets are so soft! If you have something
that you want special to be made just message
her. Her name is Lynda!
Lynda is a sweet lady so check her out!
Here is a lovely blanket she has made and she
makes others! Check her out here:
http://www.ebay.com/sch/just_jas/m.html?item=122462958177&hash=item1c835c7261%3Ag%3AdVAAAOSw2gxY1ubk&rt=nc&_trksid=p2047675.l2562

Granny's bed has a pretty green
sheet with a pretty pink top sheet.
It has a matching pink pillow
and a ribbon pillow.
Granny got rid of her old bed
for a newer one with an old
style. She sleeps alone now, so
no need for a full size bed.

A view of the foot. Here you can
see where I sewed on the green
ribbon for a dust ruffle. The same
ribbon used for the window valance.

The head of the bed where I started and stopped
with the dust ruffle.

The top sheet is just pinned down to stay. I try not
to use glue unless I have to.

Here are the pillows on the bed. I did not
want a pillow sham. Granny does not sleep
with them.

Don't you agree that this is a lovely
bedcover!!

I was experimenting on how I wanted
the bedspread to go.

Since the bed will go against the wall.
I opted for the blanket to touch the floor
on one side.

This is where Granny's bed is going. At least
that is where she told me to put it!

A view of the items on the bay window looking in
from the outside. I am for sure a peeping tom!

I love to see things thru the window!

Here are the pictures that are going up on Granny's
wall above her bed.
The brown wood frame houses a birth certificate
that I cut out of a magazine back in 1995. When
my grand daughter was born I wrote in her name
and her date of birth and all of the other necessary
information that the certificate asked for. As you
can see the frame is a little bigger than the certificate, but
it does not look bad. This was written in 20 years
ago. I forgot that I had it until I found it in one of
my miniature boxes.
So anyway, I will be putting the pictures on the
wall in this order.
I found 3 frames that did not have pics in them,
so I had to go looking for something to fit them.

I found 2 doll pictures in my miniature dollhouse
magazine and cut them out. They just fit in these
2 frames. I could not find a picture to go into the
last frame so I opted not to use it.

So far, here is what the room is looking like with
some of the bay window showing.

Here is the room showing the pics on
the wall. Granny is really pleased with
the movers. They moved her bed aside
to hang the pictures and then pushed
it back against the wall for her.
This is Granny's first night sleeping
in her new apartment. She is very
excited!

I think the pics look great above Granny's
bed! This view came from outside the bay
window.

Here is a better pic of the pictures looking thru
the window!
I hope you have enjoyed looking at the middle
section of Granny's apartment. I am still not thru
here. More to come under the bay window. I am
amazed at how much this apartment is holding!
I hope you have enjoyed this bed area and the
little story that I have put with it.
Thank you for visiting me! 
Hopblogger