Thursday, July 7, 2011

Thrift Store - BOUGHT WONDERFUL ITEMS!

and start going to those Estate Sales and those
Thrift Stores.
There are some wonderful things
waiting there for you!

Take a look at what I found
for $3.00 - yep that's right!
Sorry about some of my photo's.
Lately they seem to be a little fuzzy.
Maybe my batteries need changing.
Lord knows that the camera sure does get used!

 This little cross stitch box was just full of stuff.
Look at the pretty blue glass bowl.
There are some filled jars in there.
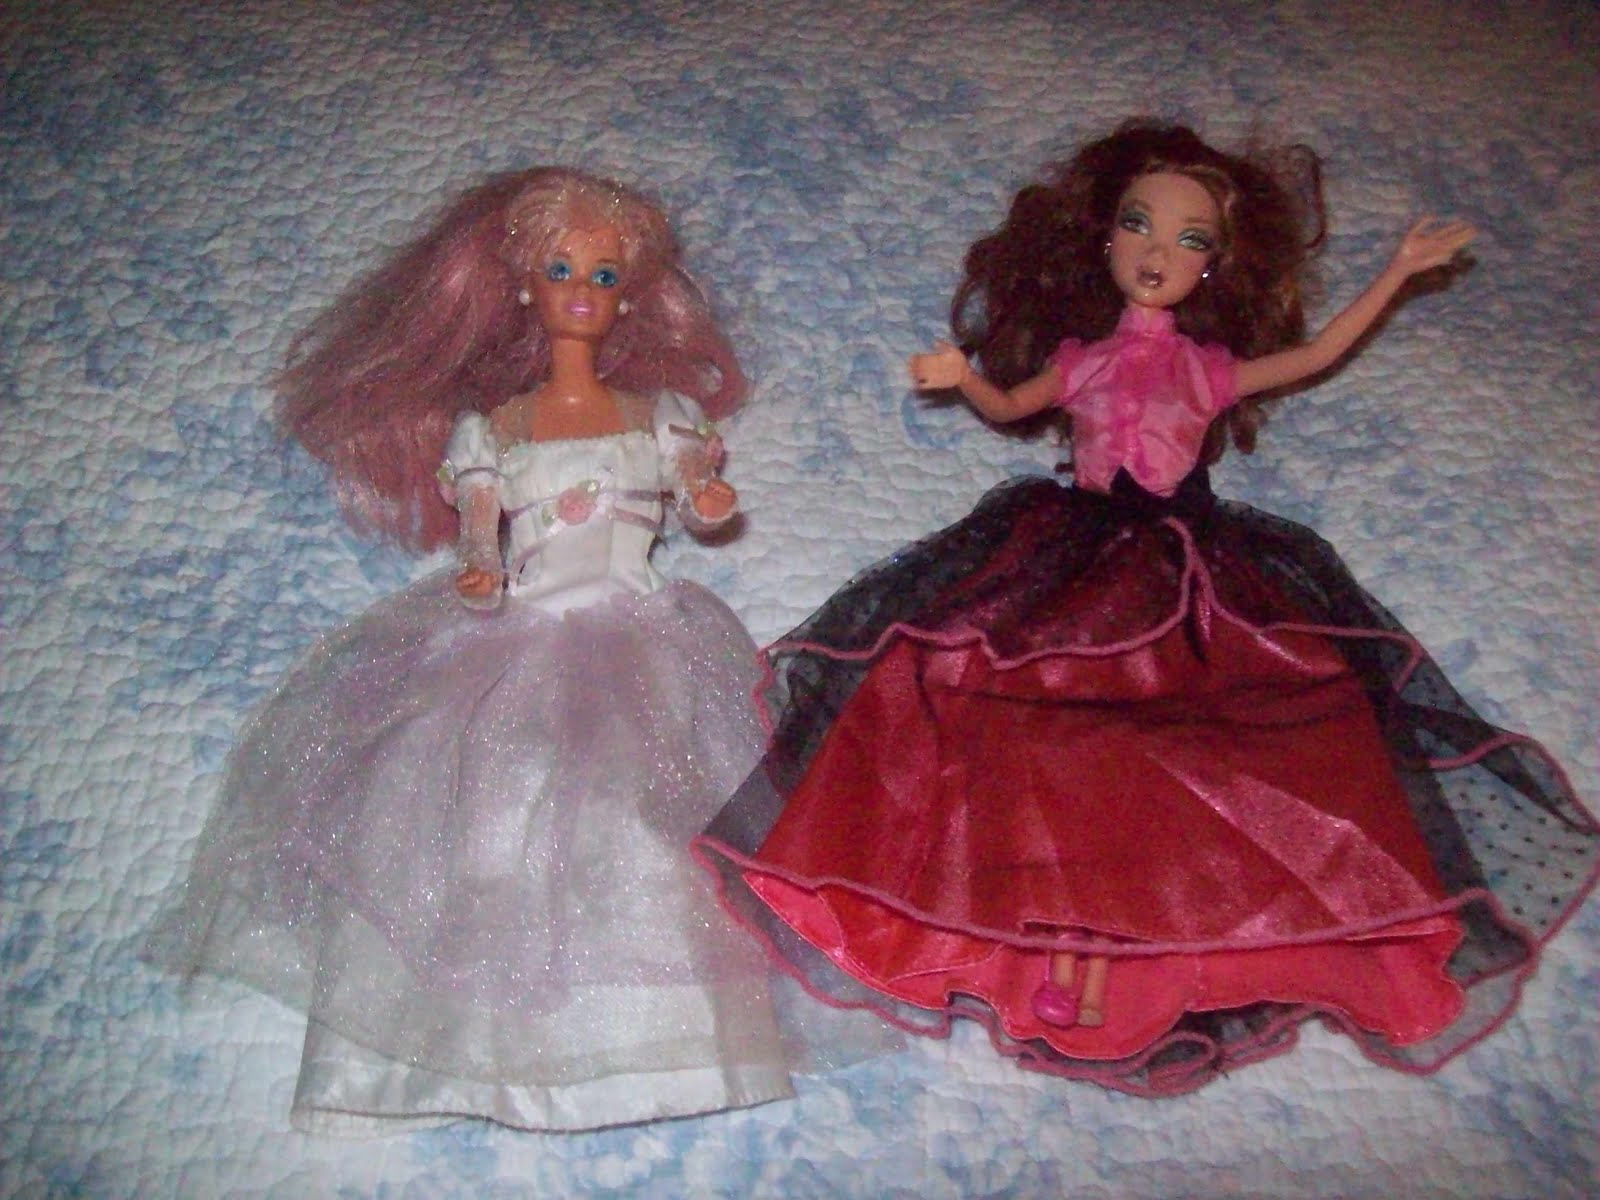
I got a little doll - yippee!!
There is also a little doll
beside the yellow haired dolly that doesn't have a
head.
She will come in handy for a witch cottage.

Tennis anyone!

 All of the glass pieces are in mint condition.
Nothing
wrong with the brass bowl.
And my absolute favorite
is the little white tin box with blue letters.
It says bread and cake. So vintage!

 Hey - many items in this box is brand new.
Lucky me!

 A little juicer. I just love it!!
There are only 2 little tulip bowls.
Ice cream anyone!

 There are 2 different types of stools in here
and food.
My tenants are so hungry!

 All of my tenants love cheese.
Yum-yum!

 There are some cute metal pots with lids.
I was
needing some paint cans to hang from the ladder that is
on the outside of the apartment building.
These are perfect.
Even though they are not the correct colors
its okay. I will deal with it some way. 
Double click and look at the many items.
Even 2 inch canvas is in here.

 Here are some cool pieces.
A corkscrew and 2 bottle openers.
Still in their original plastic - never been opened.
So get out there.
There isn't any telling what you might find!
Be sure to enjoy yourself.
Many hugs and kisses
Conny

Friday, July 1, 2011

Apartment Samantha - Gauzy Bedding and Bed Canopy Using Barbie Dress and Cheesecloth

This is the ruffled tulle from a
Barbie wedding dress.
It is suspended from the ceiling with a
little hook.
All of the little strings are knotted
at the top.
The knot hangs on the hook.

Samantha's Bedding and Canopy was
very easy to make.
Check the tutorial section on how to
make the canopy's!
The bedding was simple also.

In prior pics before the make-over
of Samantha's apartment - her bed
used to be flat.
Since I did not have any foam seat padding
the obvious solution was to wrap
cheesecloth or gauze around the existing
mattress. 

Check out the tutorial on how to make
my mini mattresses.

To make the bedding, without making a
new mattress - just take the existing mattress
and make sure that the cheesecloth/gauze
is larger than the mattress.
Use cheesecloth/gauze that is wide enough
to extend past both ends of the mattress,
so that all of that excess cheesecloth
can be turned under at the head and foot
area of the mattress after you finish.

Begin by using 2 layers of cheesecloth/gauze
and start at either the back or front of the
mattress and wrap the cheesecloth all around
the mattress as many times as you want/need to
get the desired fluff.
When finished wrapping, cut the cheesecloth.
Tape or pin the cheesecloth down.
(I did not tape or pin the cheesecloth down).
Pick up the large gauzy mattress from the sides.
Gently turn under the top to the backside,
and repeat for the bottom.
Place into the bed frame.
Go around the bed frame and make sure
the mattress is even and straight and that
all raw edges are tucked neatly under.
DONE!!

Instead of a bed pillow - all I did was roll
up a thick piece of gauze to the width of the
little bed.
To keep it together cut some of the
gauze and on both ends tie it around the bolster
into a knot and a bow.
The little pillow in front of the bolster is one of
the little pillows from the prior bedding from about
15 years ago.
Somehow I had lost the other bed pillow.

 Here is the another tulle/netting cut off from a
Barbie dress.
I can not hang it the same way as I hung
the other one.
Right now this little netting is just
hanging there on its own, untl I figure out a way to
hang it.
It is draped around an old bed that
I got recently from an estate sale.
The little bed is in
bad shape. It is dirty and needs new bedding.
I am not sure how old this piece is.
Its a shame that it has to be re-done.
The bed needs a make-over!
Maybe something with purple in it to match
the purple in the canopy.

 Just another view of the bed and the netting. This
little bed fits nice in this little space.
Not bad is it.
Thanks for stopping by to see us!
Have a good day!
Conny

Thursday, June 30, 2011

CLOTHES - I AM A BARBIE CLOTHES BASHER!!

I bet you are wondering what I am
going to do with these BARBIE Gowns!!
I want the mosquito netting overlays.
 
Be sure to check out my tutorial.
TUTORIAL - MAKE EASY CANOPY'S FROM
BARBIE TULLE DRESS OVERLAYS!!!
 
I wanted to show you how I make my
Bed Canopy's!
Yes - I cut up the Barbie dresses
to get the tulle overlays!
The gowns are very cheap.
You might even have some at home
somewhere.
I love using these because they
are so used and not stiff
like new tulle.
 
If you want to see one of these
Barbie doll overlays, check out
Samantha's apartment.
There is a Barbie doll Tulle slip
that is hanging above her white bed!!!
 
I will try to use all of Barbie's gown.
I do not like anything to go to waste.
The gown on the left is a Barbie bridal gown.
It is actually made of 2 pieces of tulle - a purple
and a white.
The gown on the right is a pinky satin
with a black tulle overlay.
I have plans to use the black tulle with
pinky trim on my witches bed!
 
I have plans of using her pink hair too.
Her sleeves glitter so I will cut
them off and display them as fingerless
gloves!
I will see if they need a hem or not.
The remainder of the white satin
gown underneath the tulle could be
used for a regular skirt.
 
Hmmm....I wonder if the black tulle would look
good as a cape for the witch Permelia!!

 
LOOK AT Barbie's accessories!
Be sure to look out for any jewelry
that is around their necks or wrists.
Some of that can be displayed in a small
jewelry box.

A ring stone can be cut off and glued
onto a small sequin and displayed also.
Don't forget high-heels!
These can be painted and placed
in little shoe boxes.
As long as the shoes are in small
shoe boxes then they will look
real enough.
 Last - look at their hair.
If it is in good shape consider making
little wigs out of them.
 
Also do not forget to take a look at the smaller dolls.
Their little chunky shoes are so cute.
You can display them out in the open.
Their little dresses are just right
to display.
Some of their accessories are just the right size.
And be sure to wash up any clothes on these dolls.
Its amazing how bright they become!
by Conny

Saturday, June 25, 2011

TUTORIAL - MAKE EASY CANOPY'S FROM BARBIE TULLE DRESS OVERLAY'S

I love anything that looks nice and
is easy and fast to make.
Are you like that also?
 
I was at the thrift store one day,
and saw some (Barbie/fashion doll) long gowns.
Some of them were in very bad shape.
But those are the ones that I buy!!
 
My intentions are simple - CUT THEM UP!!!
 
The gown is still nice, but
see the tulle - it rides up and does not
lie flat.
Really it is best to
remake remix reuse the parts!
At least while some parts are still useable.
Directions are really fast and simple!
Read on.
 
1st - I cut away the top half of the bodice.
Leave some as I have here to turn under.
 
 2nd - I cut away the fabrics on each side of
the seam.
 
3rd - This is what it looks like
laid open and flat on the table.
 
4th - If you like this look, then leave
the white skirt on, that is under the tulle.
Do not make a front seam.
Turn down the white (at the top where my fingers are),
to the inside and stitch down
lightly gathering.
Butt the 2 raw edges together
and tack together only on the white.
 
5th - Double thread a needle at least
6 inches long with candle-wicking thread,
knot on one end.
The tulle is open in the front.
On the inside of the tacked edge, with your needle
and knotted thread make a tiny stitch
and then leave a 6 inch tail like you see
in the photo.
Thread needle again and stitch in the
back and leave a 6 inch tail again.
Repeat for the sides.
When you finish it should look like the
picture.
Tie a knot as the picture shows to keep
all of the threads together. Make
sure that there is no slack and all threads
are even.
 
6th - Decide where you want to hang the
canopy and screw an 'screw eye' in the ceiling.
Decide how low or how high you want
the canopy to hang from the floor.
Adjust the knot lower down or higher up
and cut off excess threads.
Hang canopy on the 'screw eye' near the knot.
 
I like only the tulle, so I am preparing to
cut off the skirt. Separate the tulle from the skirt.
Finger press both items down.
 
With scissors cut the tulle away from the skirt.
Try to cut evenly and straight.
 
Follow steps 4th, 5th and 6th.
 
Here is a canopy made, already hanging.
Side view.
 
Here is the same canopy hanging. Looks cute!
Front view.
 
I wanted to show you the canopy already made
that is pictured above.
It was made the same way.
I washed both of them, as they were really dirty.
The canopy on the left is more dirty than the other.
 
This one was so dirty that I washed it at least 6 times.
And then I stopped - thinking that it would not become
white.
But that is okay because it will look old,
well-used and will drape nicely.
This is the one that you see hanging with the
purple in the front (2 pictures up).
This one could even become a wedding veil!!
 
 
 This one became whiter almost immediately.
Apparently it is not as old as the  other one.
It is a bright white!
As of yet I have not placed this anywhere.
 
 Several times both canopy's was draped
on my faucet.
Even on the faucet see how well they drape.
 
 Candle-wicking thread is used
for the long strings. Of course
the needle was double threaded.
 
 There is a bulky seam that I didn't think would be
a problem. But I think that it looks so bad so I shall
remove it later.

The canopy is still cute!
Thanks for stopping by!
Hopblogger


Monday, June 20, 2011

Just wanted all of you

to know that I am unable to comment
on any of your blogs. Something is wrong
with Blogger still.
At least I am able to visit your blogs.
Thank you all for your comments that
you have left me. And welcome to all
that are my followers.
For those of you that do not know this -
but I have another blog.
Visit me there also.
by conny