Hello Yawl!!
Thank you for your sweet comments. I hope
that everyone has been well. Sorry that it
has taken me so long - but I have been
juggling surgery's while working on this
apartment.
WHEW!!
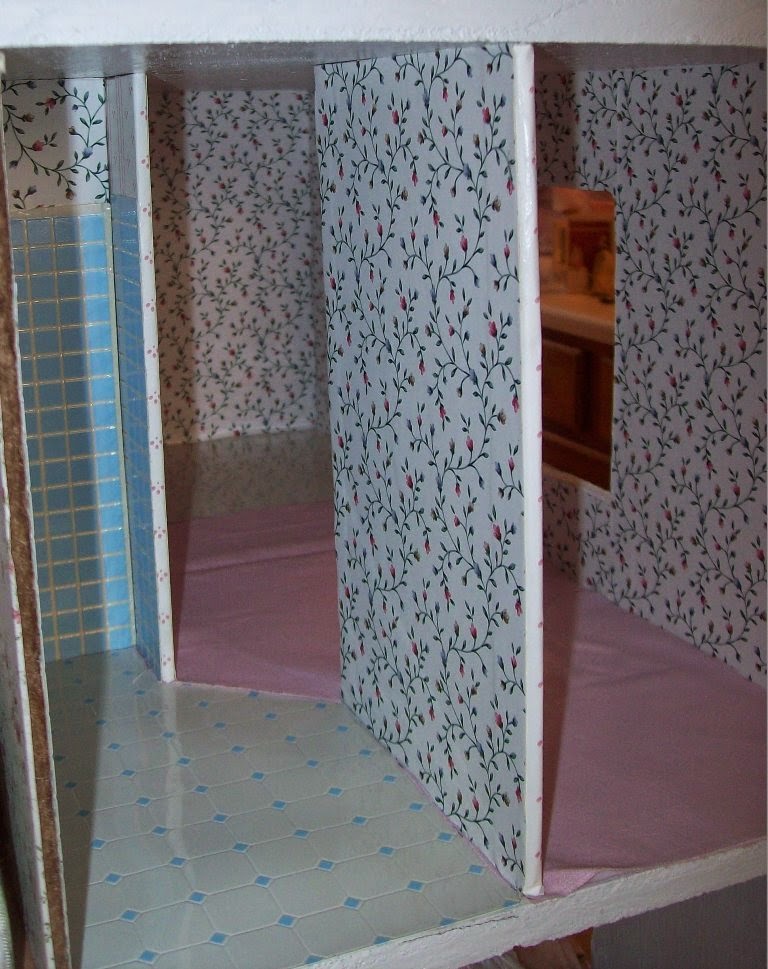
Finally apartment #10 is done!! I did not think that
I would ever get finished with this apartment.
I took over 400 pictures and have decided
that I will be splitting this apartment up into
2 posts. There are just so many pics.
So, on this first posting I will show you what
is going into the apartment. And the next posting
(after I finish with another surgery) will be the
final apartment. I still have to go thru those
pics and crop them of course. But the next
pics are coming.
Yes - this apartment is small but has kids!!
I have carried this bear around forever! So I decided
it was going on the bunk bed!
The bear is adorable holding the little pink rabbit!
He is resin or clay, I do not know. He is attached
to this blanket.

This is the top of the white iron bunk-bed. Twin girl
sisters share this tiny space. Christy Rose loves dolls
and is the oldest twin - so she gets the top bunk by choice, of
course. I bought the little doll from a woman on eBay.
She was handmade by her mother many years ago.
The doll was so inexpensive that I could not pass her up.
She is darling and her name is Dixie. Christy Rose
names all of her dolls, which she does not have many.
Only what you see. The 2 raggedy Ann's were buttons
that I cut off the back shank. Christy Rose named them
because they were twins just like her and her sister.
The raggedy Ann's are named Mary and Carrie.

I have had nearly all of the furniture for all of my
apartments for years. Some things I have are at
least 9 or 10 years old. That is the case with this
bunk-bed set. I love the white color and could not
bring myself around to paint it. o I added ribbons
to spruce up the color.
The bottom bunk belongs to the younger twin sister
and her name is Misty Sue. Misty Sue loves bears!
The little bear that hold a rabbit always lays on her
bed. Misty Sue always names her animals as well.
The little bear holding the rabbit is named Charley.
The little pink rabbit is named wabbit!

Both of these beds have hanky's for bed linens.
Misty Sue's bear is a big bear and he is named
Hank. He sports a little yellow ribbon around
his neck and hangs on to the post of her bed.
She can always find him when she needs a hug.

I bought these little clothes a couple of months
back. So tiny they are as well as being inexpensive!
The twin girls do not wear these.
THESE ARE PLAY DRESS-UP CLOTHES.
I made the basket from Aida cloth to hold them.

Then I squashed the basket down many times,
so it would look like the girls have to really put their
bodies into the basket to take out the play clothes.
I wanted the basket to just look used.

Then I added ribbon around the top of the basket
and made a lid with a ribbon handle. No frills here.
Again I squashed down the basket with my hands.

There is only one armchair in the apartment.
No sofa.
So this is Delilah Kate's chair.
The girls do not mind sitting on the floor or
in their little chairs. In its
former life, Delilah's chair was an ordinary pink
checked chair. So cheap
looking they are, but they are cute when you fix them up.
I tried to
put 2 chairs in the apartment but it would
not work, so only one.
So this chair got
bulked up along with a slipcover that I made.
I want the chair to look clean and not dirty.
After all there are children in this apartment.
I have never slipcovered a chair before,
so I wanted this to be super easy.
While at the thrift store one day, I found
a cute pink with white dots NEW baby pants.
Stretchy!!! Size is about 6 months.
That is exactly what this is!! So, I bought
them, took them home and washed them.
I did not write down any directions
because I did not know if it would work.
But it did work!!
There was just enough fabric to upholster
the little chair.
SO LETS SEE IF I CAN GIVE YOU
SOME DIRECTIONS!!
What I did was, on one leg, from the tip
of the toe to about 6 inches up,
I then
cut that piece off. I cut a long skinny
strip of the same for the tie.
I padded the
back of the seat with cotton balls that
comes out of medicine bottles.
I opened
up the cotton strips and pulled them
slightly apart to fit the chair.
I did the
same thing to the seat. Since the fabric
was stretchy - I stretched the foot of the
baby pants over the chair
carefully so
as not to disturb any of the cotton on
the chair. Make sure that
the heel is towards
the back. That way the front is smoothed.
Do not worry about sewing a hem
on the bottom of the chair,
just cut off any
excess and turn under.
No sewing on this project. Then take the long
strip that you cut and put it around
the front and tie in the back.
Make sure that it is even.
When I finished that, I made
a little cushion for the seat.
Stuffed with a cotton ball and then sewed on the sides.
The doily's with roses came from a
doily that I had.
I have collected doily's
and vintage fabrics for years.
So I cut the roses off and glued them
lightly to the chair arms and back.
I have used this same fabric in other
areas of the apartment as well.

This is one of the sides.

This is the other side.
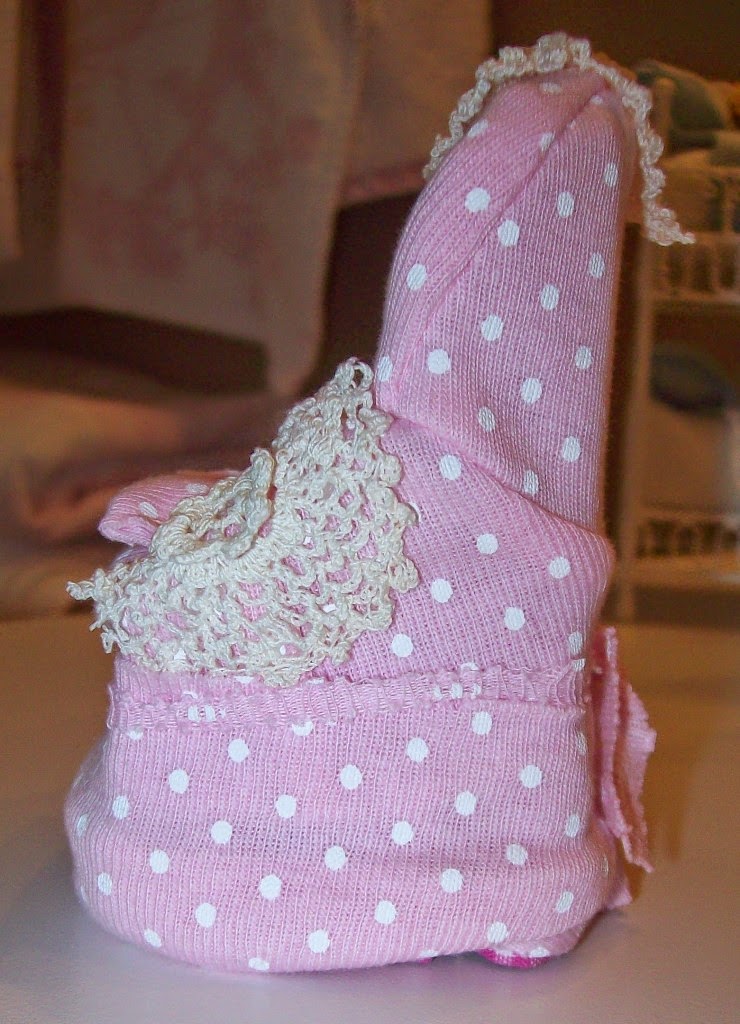
This is the back. Not even a bow here,
just tied it in a knot. See the seam, that
is the bottom of the baby pants.

I know that I am late, but this apartment was
suppose to be for Easter.
I bought something from eBay a long time
ago and these little Easter baskets
were in there.
There were 3 total, pink, blue and purple. I
have only used these 2.
There was some old stuff in each of the
baskets to represent grass. Moss I think.
It took
me days to pick out all of that glue and moss.
It left the eggs looking dirty and I decided
that I liked that.
It looks like they were outside in an Easter egg hunt!
The blue bear is named Blob and the white bear is named
cissy.
Yea, these belong to Misty Sue.

Misty Sue also owns this bear.
She named her Miss Pearl.
I worked on Miss Pearl for a few days.
I made her an umbrella and dressed her little body.

Miss Pearl is an old bear that I have had for ages. I
was surprised to see how
expensive they were on eBay. This little bear is
jointed and her head moves
from side to side.
Her little dress is lace and her collar
is a piece of the doily that I cut.
All bows are made from floss.

I made her panties from ribbon.
The little shoes took me an
entire day and then some to make.
There is cardboard
in the bottoms to help make her stand up on her own.

This little ironing board and iron belong to Christy
Rose. She enjoys ironing with her little playset. I
edged it with some pale pink trim.

I saw this little dolly on eBay. No one bid on
her so I was able to get her for 3 dollars. One of
these days I will make her a tiny, tiny bottle once
I figure out how.
She is waiting for one!
Anyway she is a little over a half inch.
Christy Rose named her Bonnie Blue after
"Gone with the Wind",
Scarlet's baby.
Because of her blue baby eyes!
One of these days I will put a skirt on her.

I saw this little crib. It is only 1 inch long!!!
It was only a dollar fifty. No way was I going to pass
that up.

So, I made a little blanket and pillow and put it
on the inside for Bonnie Blue to have some
comfort.

Bonnie Blue is so sweet!! I bought
her from getsixtysix on eBay.
Darling and tiny!

I had a mirror from a compact that I have had for
ages. I glued cardboard to
the back and trimmed it
with some of the stretchy pink and white dot baby
pants.
I like that it looks a little old.
The lamps was a brass color, I painted it white
and gave a ruffled
skirt to the plastic frame after gluing
on some pink
fabric to the top.
I did not hem it either.
I like the raw edges at the top.

This is a pic of the top.

I painted the white brass and some of the plastic so
as to make the bulb appear smaller.
Then I glued
the bottom of the skirt to the inside of the plastic
shade.

This is the curtain that will hang in front of the bay
window.
Notice that there are not 2 panels.
The reason for that is, is because on the
other side of the window
I want to be able to see the bed. And a panel
will hide that. So that's why there is not another
panel here.
This curtain and valance are made from a vintage
table runner.
It had holes in it so I salvaged it to
go in here.
I still have more of this runner left that
I can work around but it will most likely go somewhere
else. It was hard to cut up this little table runner,
but it was not doing me any good setting there in
a box.
Better to use it.

These are the items that will be going on top of the
valance since I made it to hold items.
I made the
hat box and the little baskets from Aida cloth.
Edged them with ribbon and lace and
left one basket plain.
I used bottle caps for the bases and
glued the fabric on top.
The girls do color and write every now and
then, so I needed a basket to hold
their crayons and pencils.
Everything in that basket are Jolee's Stickers.
They are rounded on all sides except for one side
which is made flat to stick.
But other than that they do look real.

I decided to make a photo album.

This shows the inside.

There are old family pics of ancestors in this
album. I used a gold pen for the frame around each
photo.

I got this sewing box last year. It does not open up
any further than that. So it is just peeking.

This is the front of a little cami that is in the closet.
I got it for a steal on eBay also. It looks to be printed
on cotton fabric and then laced up the front. That is
all that I can tell about it. But it is cute.

Here is the back.

Sorry that this photo is blurry. This is a little
white iron patio table. I know you have seen them.
It comes with 2 white chairs. I needed for it be
higher.

So I stuck this hummingbird thing to the top with
tacky wax. So I can take it off if I choose later. This
adds lots of color to this apartment.

I have had this apron for a couple of years. It
comes from a FULL-SIZE APRON KIT. You
know the kind that you have to cut the apron out
and then just stitch around it. Well, on my
other blog - www.remakeremixreuse.blogspot.com
there is a full-size apron that I made and gave
to my sister Lori. This little apron is printed on
these sheets. All I did was cut it out put some
fray check on the sides so it would not ravel.
Then glue on some ribbons for the neck and
the waist. This apron has cupcakes on it. It is
identical to the one that Lori wears. Somewhere
around here is another kit for a full-size apron.
So when I find it then I will cut out the
blue one and do the same thing as I have done
here. So this little apron has been waiting
for a home for a couple of years now.

This is the back - no back!

These 2 little robes are so darling. Both of
them are from Jolee's stickers. I bought
these from A.C. Moore
crafts store about a year ago, just hoping to use them.
They had them in blue also for boys.
On the back of these robes are stickers,
so they will stick. I just peeled it off.
These are full robes!
See the teddy bear face.
These are adorable!!
The twins just had to have them.

This is (the mother) Delilah Kate's bed. I bought
this bed from (I believe) Wal-Mart about 18
years ago. It was plain wood back then.
Since then I painted it blue. One coat and
sanded it off in some areas.
I love the hearts on the
headboard and the footboard.
This has been packed away
for years until this apartment.
So I am so glad that
it fits here in this apartment. This is a
single bed and
I do not think that you can buy this bed today??

Again I used the stretchy baby pants for the bedding.
I made 2 pillows and also stuffed them with cotton
balls from the medicine bottles. This way they can be
scrunched up or made to look like used pillows.
I have found that stretchy material allows you to have
more give. If you know what I mean. By lightly stuffing
them, it gives the pillows more movement and pliability.
So the front pillow is lightly stuffed and the back pillow
is more firmly stuffed. The white blanket is from a cotton
shirt. I love the knots or whatever it is on top. It helps
to give an old look to the bed. The blanket does have
a backing. The dust ruffle is lace as you can see.

A view from the top of the bed.

I am really excited to tell you about this purse.
I am sure that you can see that it is Petit-Purse.
A nice tutorial is on the internet. I have
forgotten
the lady's name that gave us this tutorial, but I just
love it. Thank you for sharing it
with us!! Anyway I made 4 of these. All of them
in different kinds of fabrics.
I do not know if you can guess what I made this
purse out of.
It is made with a button, floss as you can
see, but the fabric is not fabric.
It is a paper towel
and the plastic is a trash bag. I love using different
materials!!

A couple of years ago I bought these lovely shoes
from a lady on Etsy. I am sorry that I cannot remember
your name. I just had to buy them!

I made 3 fabric bolts. Two of them are from fabrics,
however the beige one is not fabric. Again I used
a paper towel that I tea dyed!!

You cannot even tell that it
is a paper towel.

I have carried this bear around forever! So I decided
it was going on the bunk bed!
The bear is adorable holding the little pink rabbit!
He is resin or clay, I do not know. He is attached
to this blanket.
This is the top of the white iron bunk-bed. Twin girl
sisters share this tiny space. Christy Rose loves dolls
and is the oldest twin - so she gets the top bunk by choice, of
course. I bought the little doll from a woman on eBay.
She was handmade by her mother many years ago.
The doll was so inexpensive that I could not pass her up.
She is darling and her name is Dixie. Christy Rose
names all of her dolls, which she does not have many.
Only what you see. The 2 raggedy Ann's were buttons
that I cut off the back shank. Christy Rose named them
because they were twins just like her and her sister.
The raggedy Ann's are named Mary and Carrie.
I have had nearly all of the furniture for all of my
apartments for years. Some things I have are at
least 9 or 10 years old. That is the case with this
bunk-bed set. I love the white color and could not
bring myself around to paint it. o I added ribbons
to spruce up the color.
The bottom bunk belongs to the younger twin sister
and her name is Misty Sue. Misty Sue loves bears!
The little bear that hold a rabbit always lays on her
bed. Misty Sue always names her animals as well.
The little bear holding the rabbit is named Charley.
The little pink rabbit is named wabbit!
Both of these beds have hanky's for bed linens.
Misty Sue's bear is a big bear and he is named
Hank. He sports a little yellow ribbon around
his neck and hangs on to the post of her bed.
She can always find him when she needs a hug.
I bought these little clothes a couple of months
back. So tiny they are as well as being inexpensive!
The twin girls do not wear these.
THESE ARE PLAY DRESS-UP CLOTHES.
I made the basket from Aida cloth to hold them.
Then I squashed the basket down many times,
so it would look like the girls have to really put their
bodies into the basket to take out the play clothes.
I wanted the basket to just look used.
Then I added ribbon around the top of the basket
and made a lid with a ribbon handle. No frills here.
Again I squashed down the basket with my hands.
There is only one armchair in the apartment.
No sofa.
So this is Delilah Kate's chair.
The girls do not mind sitting on the floor or
in their little chairs. In its
former life, Delilah's chair was an ordinary pink
checked chair. So cheap
looking they are, but they are cute when you fix them up.
I tried to
put 2 chairs in the apartment but it would
not work, so only one.
So this chair got
bulked up along with a slipcover that I made.
I want the chair to look clean and not dirty.
After all there are children in this apartment.
I have never slipcovered a chair before,
so I wanted this to be super easy.
While at the thrift store one day, I found
a cute pink with white dots NEW baby pants.
Stretchy!!! Size is about 6 months.
That is exactly what this is!! So, I bought
them, took them home and washed them.
I did not write down any directions
because I did not know if it would work.
But it did work!!
There was just enough fabric to upholster
the little chair.
SO LETS SEE IF I CAN GIVE YOU
SOME DIRECTIONS!!
What I did was, on one leg, from the tip
of the toe to about 6 inches up,
I then
cut that piece off. I cut a long skinny
strip of the same for the tie.
I padded the
back of the seat with cotton balls that
comes out of medicine bottles.
I opened
up the cotton strips and pulled them
slightly apart to fit the chair.
I did the
same thing to the seat. Since the fabric
was stretchy - I stretched the foot of the
baby pants over the chair
carefully so
as not to disturb any of the cotton on
the chair. Make sure that
the heel is towards
the back. That way the front is smoothed.
Do not worry about sewing a hem
on the bottom of the chair,
just cut off any
excess and turn under.
No sewing on this project. Then take the long
strip that you cut and put it around
the front and tie in the back.
Make sure that it is even.
When I finished that, I made
a little cushion for the seat.
Stuffed with a cotton ball and then sewed on the sides.
The doily's with roses came from a
doily that I had.
I have collected doily's
and vintage fabrics for years.
So I cut the roses off and glued them
lightly to the chair arms and back.
I have used this same fabric in other
areas of the apartment as well.
This is one of the sides.
This is the other side.
This is the back. Not even a bow here,
just tied it in a knot. See the seam, that
is the bottom of the baby pants.
I know that I am late, but this apartment was
suppose to be for Easter.
I bought something from eBay a long time
ago and these little Easter baskets
were in there.
There were 3 total, pink, blue and purple. I
have only used these 2.
There was some old stuff in each of the
baskets to represent grass. Moss I think.
It took
me days to pick out all of that glue and moss.
It left the eggs looking dirty and I decided
that I liked that.
It looks like they were outside in an Easter egg hunt!
The blue bear is named Blob and the white bear is named
cissy.
Yea, these belong to Misty Sue.
Misty Sue also owns this bear.
She named her Miss Pearl.
I worked on Miss Pearl for a few days.
I made her an umbrella and dressed her little body.
Miss Pearl is an old bear that I have had for ages. I
was surprised to see how
expensive they were on eBay. This little bear is
jointed and her head moves
from side to side.
Her little dress is lace and her collar
is a piece of the doily that I cut.
All bows are made from floss.
I made her panties from ribbon.
The little shoes took me an
entire day and then some to make.
There is cardboard
in the bottoms to help make her stand up on her own.
This little ironing board and iron belong to Christy
Rose. She enjoys ironing with her little playset. I
edged it with some pale pink trim.
I saw this little dolly on eBay. No one bid on
her so I was able to get her for 3 dollars. One of
these days I will make her a tiny, tiny bottle once
I figure out how.
She is waiting for one!
Anyway she is a little over a half inch.
Christy Rose named her Bonnie Blue after
"Gone with the Wind",
Scarlet's baby.
Because of her blue baby eyes!
One of these days I will put a skirt on her.
I saw this little crib. It is only 1 inch long!!!
It was only a dollar fifty. No way was I going to pass
that up.
So, I made a little blanket and pillow and put it
on the inside for Bonnie Blue to have some
comfort.
Bonnie Blue is so sweet!! I bought
her from getsixtysix on eBay.
Darling and tiny!
I had a mirror from a compact that I have had for
ages. I glued cardboard to
the back and trimmed it
with some of the stretchy pink and white dot baby
pants.
I like that it looks a little old.
The lamps was a brass color, I painted it white
and gave a ruffled
skirt to the plastic frame after gluing
on some pink
fabric to the top.
I did not hem it either.
I like the raw edges at the top.
This is a pic of the top.
I painted the white brass and some of the plastic so
as to make the bulb appear smaller.
Then I glued
the bottom of the skirt to the inside of the plastic
shade.
This is the curtain that will hang in front of the bay
window.
Notice that there are not 2 panels.
The reason for that is, is because on the
other side of the window
I want to be able to see the bed. And a panel
will hide that. So that's why there is not another
panel here.
This curtain and valance are made from a vintage
table runner.
It had holes in it so I salvaged it to
go in here.
I still have more of this runner left that
I can work around but it will most likely go somewhere
else. It was hard to cut up this little table runner,
but it was not doing me any good setting there in
a box.
Better to use it.
These are the items that will be going on top of the
valance since I made it to hold items.
I made the
hat box and the little baskets from Aida cloth.
Edged them with ribbon and lace and
left one basket plain.
I used bottle caps for the bases and
glued the fabric on top.
The girls do color and write every now and
then, so I needed a basket to hold
their crayons and pencils.
Everything in that basket are Jolee's Stickers.
They are rounded on all sides except for one side
which is made flat to stick.
But other than that they do look real.
I decided to make a photo album.
This shows the inside.
There are old family pics of ancestors in this
album. I used a gold pen for the frame around each
photo.
I got this sewing box last year. It does not open up
any further than that. So it is just peeking.
This is the front of a little cami that is in the closet.
I got it for a steal on eBay also. It looks to be printed
on cotton fabric and then laced up the front. That is
all that I can tell about it. But it is cute.
Here is the back.
Sorry that this photo is blurry. This is a little
white iron patio table. I know you have seen them.
It comes with 2 white chairs. I needed for it be
higher.
So I stuck this hummingbird thing to the top with
tacky wax. So I can take it off if I choose later. This
adds lots of color to this apartment.
I have had this apron for a couple of years. It
comes from a FULL-SIZE APRON KIT. You
know the kind that you have to cut the apron out
and then just stitch around it. Well, on my
other blog - www.remakeremixreuse.blogspot.com
there is a full-size apron that I made and gave
to my sister Lori. This little apron is printed on
these sheets. All I did was cut it out put some
fray check on the sides so it would not ravel.
Then glue on some ribbons for the neck and
the waist. This apron has cupcakes on it. It is
identical to the one that Lori wears. Somewhere
around here is another kit for a full-size apron.
So when I find it then I will cut out the
blue one and do the same thing as I have done
here. So this little apron has been waiting
for a home for a couple of years now.
This is the back - no back!
These 2 little robes are so darling. Both of
them are from Jolee's stickers. I bought
these from A.C. Moore
crafts store about a year ago, just hoping to use them.
They had them in blue also for boys.
On the back of these robes are stickers,
so they will stick. I just peeled it off.
These are full robes!
See the teddy bear face.
These are adorable!!
The twins just had to have them.
This is (the mother) Delilah Kate's bed. I bought
this bed from (I believe) Wal-Mart about 18
years ago. It was plain wood back then.
Since then I painted it blue. One coat and
sanded it off in some areas.
I love the hearts on the
headboard and the footboard.
This has been packed away
for years until this apartment.
So I am so glad that
it fits here in this apartment. This is a
single bed and
I do not think that you can buy this bed today??
Again I used the stretchy baby pants for the bedding.
I made 2 pillows and also stuffed them with cotton
balls from the medicine bottles. This way they can be
scrunched up or made to look like used pillows.
I have found that stretchy material allows you to have
more give. If you know what I mean. By lightly stuffing
them, it gives the pillows more movement and pliability.
So the front pillow is lightly stuffed and the back pillow
is more firmly stuffed. The white blanket is from a cotton
shirt. I love the knots or whatever it is on top. It helps
to give an old look to the bed. The blanket does have
a backing. The dust ruffle is lace as you can see.
A view from the top of the bed.
I am really excited to tell you about this purse.
I am sure that you can see that it is Petit-Purse.
A nice tutorial is on the internet. I have
forgotten
the lady's name that gave us this tutorial, but I just
love it. Thank you for sharing it
with us!! Anyway I made 4 of these. All of them
in different kinds of fabrics.
I do not know if you can guess what I made this
purse out of.
It is made with a button, floss as you can
see, but the fabric is not fabric.
It is a paper towel
and the plastic is a trash bag. I love using different
materials!!
A couple of years ago I bought these lovely shoes
from a lady on Etsy. I am sorry that I cannot remember
your name. I just had to buy them!
I made 3 fabric bolts. Two of them are from fabrics,
however the beige one is not fabric. Again I used
a paper towel that I tea dyed!!
You cannot even tell that it
is a paper towel.
Well, that's all I have for now. I hope that
you enjoy looking at the photo's. All of this
and then some is in apartment #10.
This apartment is stuffed.
Enjoy!
Hopblogger