
Lets Make Anna's Lace Bloomers
You can use these directions to make
any pair of bloomers that you want.
You can use thin white cotton or
anything that has a little ruffle to
it.
If you use cotton you will have to hem it.
Anna's bloomers are made of lace so therefore
that is a step that you can omit.
This is the front of Anna's bloomers.

This is the back of the bloomers.

The materials needed for this project are
about 5 inches of ruffled lace or less.
And the lace is about
And the lace is about
3.5 to 4 inches from the ruffle to the lower edge but go
with what is according to the size of your doll.
But I
But I
use what I have that is available.
You will need a sewing
You will need a sewing
needle and white thread (or a sewing machine),
a couple of pins and a pair of
a couple of pins and a pair of
small or large scissors.

Measuring is simple.
Just place your doll on the lace
Just place your doll on the lace
as you see here. make sure that the ruffled part is
on her legs where you want the ruffle to be.

Now take the lace and wrap it around one leg.
Make
Make
it as tight or as loose as you want.
I don't like mine to be really tight.
I don't like mine to be really tight.
Take the other side of the lace and wrap
it around the other leg to match up with the piece that
I have my thumb on.
Then add a little more lace for
Then add a little more lace for
to make a seam.
Cut off any excess lace.
Cut off any excess lace.

Now that excess lace has been cut off.
Place the 2 seams to the
Place the 2 seams to the
left of the doll.
Make sure that you are
Make sure that you are
working with the wrong side of the lace.
Place the doll back on top of the lace.
Place the doll back on top of the lace.

A good rule of thumb is for the top of the lace is -
see her arms outstretched from side to side.
This will gather nicely.
This will gather nicely.
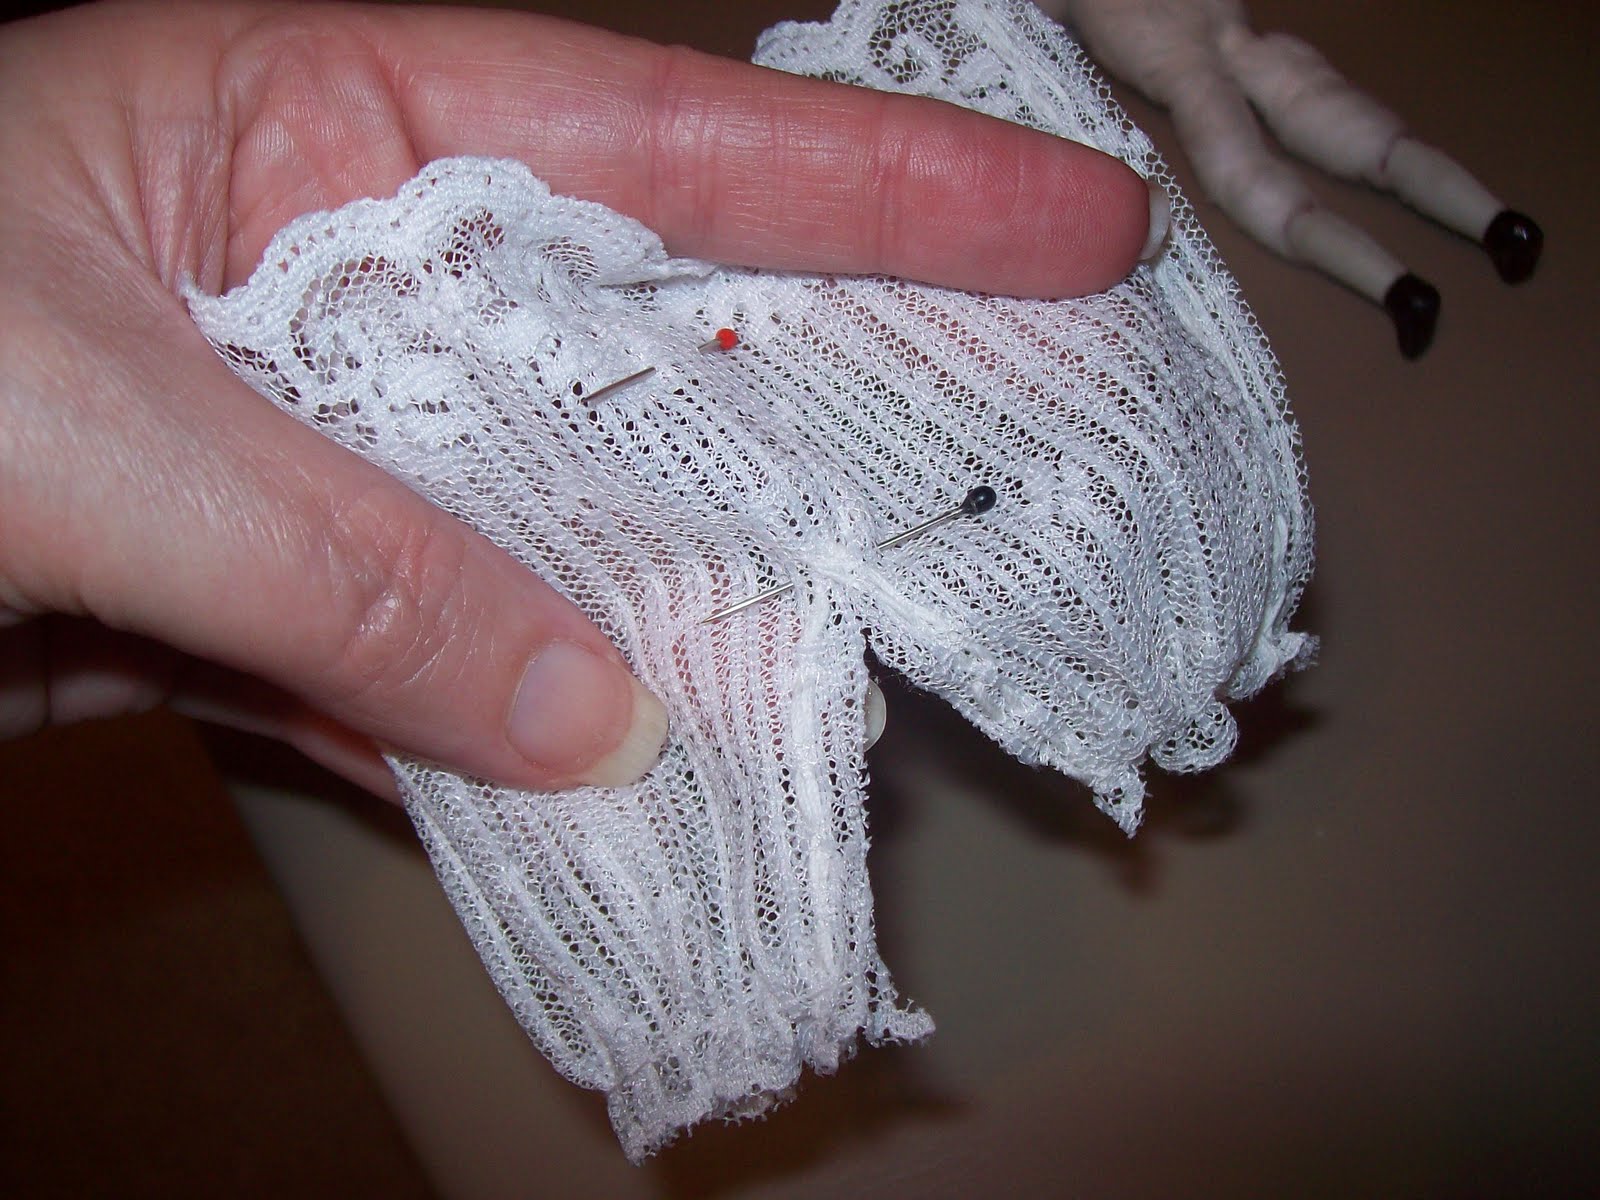
Now pick up the doll & mark
with a pin where you need to cut off the top of the
lace - see the head of the red pin sticking out from
underneath Anna.
This pin marks her waist for what I want.
This pin marks her waist for what I want.
Another pin on the lace marks her crotch.

I have removed the doll.
See - the 2 pins.
See - the 2 pins.

With the doll removed.
Begin stitching from the top of the
Begin stitching from the top of the
lace - not the ruffle.
It doesn't matter if your stitches
It doesn't matter if your stitches
are big - just don't make them too big.
Try to make
Try to make
the stitches straight if you can.
Stitch to the lace ruffle
Stitch to the lace ruffle
and back down to where you started.
You do not have
You do not have
to start your stitches on the edge of the lace because
as you see anything to the right of the pin will be
cut off.
So start your stitches close to the pin.
So start your stitches close to the pin.

I stitched to the ruffle.

Now I stitched back to where I started. Sewing
this way basically gives the seam
some strength.
Knot it.
this way basically gives the seam
some strength.
Knot it.

Cut off the thread and the excess seams.

As you can see - it looks like a slip
at this point.
Time to stitch the legs.
Fold the skirt in half and start
at the ruffle.
Remember 2 legs will be going in thru
that ruffle - so you will have to
judge where to sew in 2 seams so that
you can cut in between them - this
makes the legs!
If you understand me - then sew up to the first pin.
Fold the skirt in half and start
at the ruffle.
Remember 2 legs will be going in thru
that ruffle - so you will have to
judge where to sew in 2 seams so that
you can cut in between them - this
makes the legs!
If you understand me - then sew up to the first pin.

Anchor a few stitches by that pin.

Now proceed down the other side.
Notice that the
Notice that the
stitches on the left side curve a little.
Stitch a small
Stitch a small
curve for the right side of the leg.

See my stitches - they are not perfect!

Now, take your scissors and cut
in between your stitches.
in between your stitches.
Do not cut your stitches and when you cut up to the
pin be sure not to cut those stitches.
Take the bottom
Take the bottom
pin out and notice the red pin where its at on the lace
before you take it out.
Now turn your lace to the right side.

Hold the lace like I show here and
with your other fingers
with your other fingers
kind of pull or maneuver the lace fabric
gently to give it body and stretch,
and be careful that you do not break your seams.
gently to give it body and stretch,
and be careful that you do not break your seams.

Get your sewing needle ready to stitch again.

Place the lace back on your doll to make sure
where you need or want to cut the excess top of the
lace.

Take the lace back off of the doll and cut off that
excess lace.
The excess piece you cut off can
be used as a belt.
The excess piece you cut off can
be used as a belt.
I chose to re-use the lace for later.

Turn under the lace and with your needle and thread
start stitching around the doll till you come back
to the front and the
threads meet.
threads meet.

Knot the ends of the threads.

Just cinch up the threads to gather.
Tie in a knot or a bow.
Tie in a knot or a bow.
Its all finished now.

On this photo I just want you to see that the ruffle
isn't really tight on her legs.

I have tried to be clear in my directions.
I hope that you think so.
I hope that you think so.
by Conny